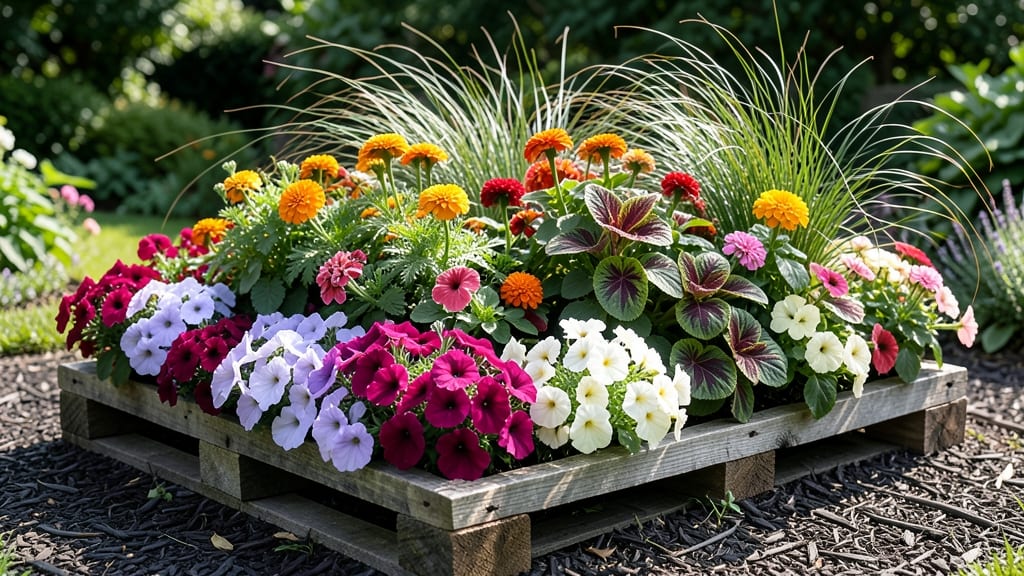
A pallet flower bed turns discarded wood into a vertical garden that blooms with personality and saves space—no expensive materials or digging required.
Picture this: a weekend project that yields a vibrant display of trailing petunias, fragrant lavender, and lush herbs—all while giving your garden a rustic-chic upgrade. The best part? You can build one for under $20 using what’s already in your yard or a local recycling bin.
Whether you’re working with a tiny balcony or a sprawling backyard, pallet beds let you customize height, shape, and plant combinations without breaking the bank.
I’ll show you how to choose the right pallets, prep them for plant life, and arrange flowers so they spill over edges like a living waterfall.
From tiered herb gardens to cascading annuals, you’ll discover 10 creative layouts that fit any space—plus the low-maintenance plants that thrive in this setup. Ready to grow beauty without the hassle?
10 Unique pallet flower bed layouts for small and large gardens
Repurposing wooden pallets into vertical flower beds is one of my favorite ways to maximize garden space while adding textured charm to any outdoor area. Whether you have a tiny balcony or a sprawling backyard, these creative layouts transform simple materials into stunning displays.
The key lies in plant height variations and strategic spacing to create visual interest while ensuring each plant thrives in its designated spot.
Before diving into designs, always sand and seal your pallets to prevent wood splinters and weather damage. Use heat-treated or cedar pallets for extra durability—these won’t leach harmful chemicals into your soil.
For drainage, drill 1-inch holes along the bottom edges or line the base with landscape fabric. This prevents root rot while keeping your plants happy and healthy.
| Layout Name |
Best For |
Key Plants |
Sunlight Needs |
Height Range |
| Tiered Herb Garden |
Small kitchens, patios |
Basil, thyme, chives, mint |
Partial sun (4-6 hrs) |
1-3 ft |
| Cascading Annuals |
Porches, entryways |
Petunias, lobelia, fuchsia |
Full sun (6+ hrs) |
2-4 ft |
| Succulent Wall |
Dry climates, low-maintenance |
Sedum, echeveria, aloe |
Full sun (6+ hrs) |
1-2 ft |
| Vertical Veggie Patch |
Edible gardens, small spaces |
Cherry tomatoes, strawberries, lettuce |
Full sun (6+ hrs) |
2-5 ft |
| Butterfly Haven |
Pollinator gardens |
Coneflowers, milkweed, bee balm |
Full sun (6+ hrs) |
3-5 ft |
| Winter Interest Planter |
Year-round color |
Hellebores, pansies, ornamental grasses |
Partial shade (3-4 hrs) |
2-3 ft |
| Fairy Garden Nook |
Kids' gardens, whimsical spaces |
Mini roses, impatiens, moss |
Partial sun (3-5 hrs) |
1-2 ft |
| Mediterranean Escape |
Drought-tolerant gardens |
Lavender, rosemary, sedum |
Full sun (6+ hrs) |
2-4 ft |
| Moon Garden |
Nighttime beauty |
White petunias, moonflowers, silver foliage
How to build a durable pallet flower bed in 5 easy steps
Repurposing wooden pallets into flower beds is a fantastic way to create vertical garden space while adding rustic charm to your outdoor area. The key to long-lasting beauty lies in proper weatherproofing, drainage, and soil preparation.
With just a few tools and materials, you can transform old pallets into a thriving flower display that lasts for years. Whether you're a beginner or seasoned gardener, these steps will guide you through the process effortlessly.
Before starting, ensure your pallets are untreated and safe for plants. Check for any chemical stains or paint marks, as these can harm your flowers. If you're unsure, opt for heat-treated pallets labeled "HT" to guarantee safety.
Gather essential supplies like landscape fabric, potting soil, drainage materials, and your favorite flowering plants. With these basics ready, you're all set to create a stunning, low-maintenance garden feature.
1
Prep the Pallet
Sand down rough edges and remove any nails or staples. Apply a wood sealant or non-toxic paint to protect against weather and pests. Let it dry completely before proceeding.
2
Add Drainage
Drill drainage holes in the bottom of the pallet if they don’t exist. Line the base with landscape fabric and add a 1-inch layer of gravel or broken pottery to prevent soil compaction.
3
Layer Soil
Fill the pallet with a mix of potting soil and compost (60% soil, 40% compost). This ensures nutrient-rich and well-draining conditions for your plants. Press lightly to settle the soil.
4
Plant Strategically
Place taller plants at the back and trailing varieties at the front. Use spacers if needed to maintain even growth. Water thoroughly after planting to help roots establish.
5
Maintain Regularly
Water deeply 2-3 times per week, fertilize monthly, and prune dead blooms to encourage new growth. Mulch the top layer to retain moisture and suppress weeds.
Once your pallet flower bed is assembled, place it in a sunny spot for optimal growth. Most flowering plants thrive in 6+ hours of sunlight, so choose a location that gets plenty of natural light.
Over time, your pallet bed will become a vibrant focal point in your garden, offering both beauty and functionality. Don’t forget to rotate plants seasonally for continuous color and interest!
For extra durability, consider adding waterproof liners or plastic sheeting underneath the pallet to protect your deck or patio. This small step can extend the life of your flower bed and make maintenance even easier.
With these tips, your DIY pallet garden will flourish for seasons to come, proving that creativity and sustainability go hand in hand in gardening.
🌱🌿🌸
★★★★★4.7(13 reviews)
|